Posted on

How to Make: Paper Strip Easter Egg Craft

Paper Strip Easter Egg Craft

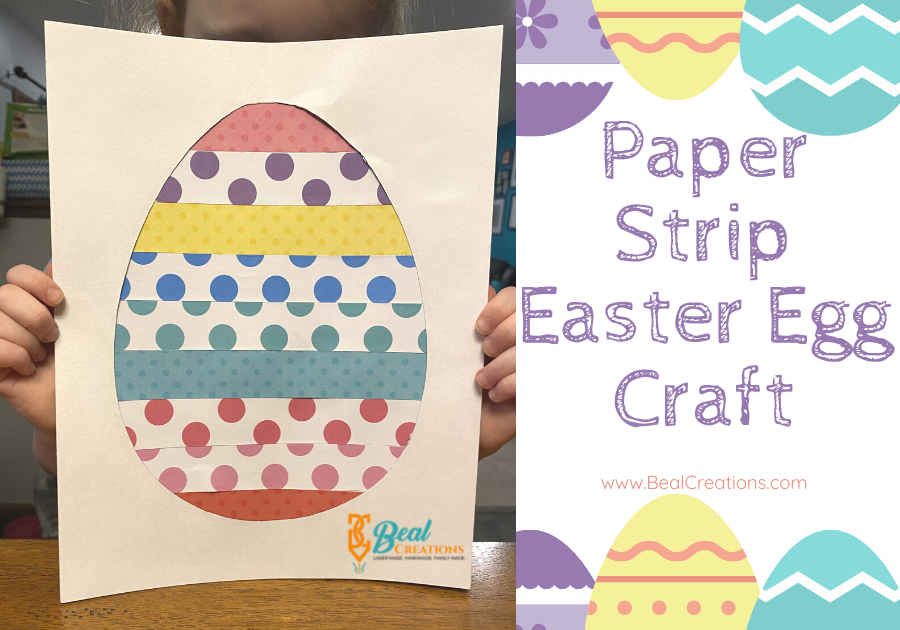
Do you scrapbook and have tons of extra scrap pieces of paper? Are you looking for an easy Easter craft to do with your kids? This is Paper Strip Easter Egg Craft was an easy craft my daughter had a lot of fun doing, and I already had everything I needed in my house.

Paper Strip Easter Egg Craft

Whether you scrapbook or not, this is a great craft for your kids to complete during Easter. You can easily use pieces of construction paper instead of scrapbook paper. You can also have your child draw lines and shapes with several different colors of markers on a whote piece of paper and cut it into strips. You could even use strips cut from magazines – really anything that will give you an array of colors.

Paper Strip Easter Egg Craft

Between my passion of scrapbooking and our business, I have so many pieces of scrap paper it is a little insane. Anyone else just CANNOT throw away scraps? I know they can be used for something some day and I do not want to be wasteful. Thankfully, just as my pile was getting a little too out of control, Easter started to sneak up on us. These scraps are perfect to make fun, multi-patterned paper Easter egg crafts.

Supplies You Will Need

  • Strips of scrapbook paper (or one of the alternatives mentioned above)
  • One piece of white cardstock paper
  • Egg outline printed on whote cardstock paper (see below)
  • Scissors
  • Glue stick
Paper Strip Easter Egg Craft Supplies
Supplies

How To Make a Paper Strip Easter Egg Craft

  1. Print the egg outline (template found below) on a piece of white cardstock paper. You can also print on colored paper or regular white printer paper if you choose. I like cardstock because it is a little sturdier and I wanted white paper so the colors of the paper strips would pop.
  2. Cut the egg out of the paper, leaving an egg shape in the paper. This will be your top layer of your craft.
  3. If your patterned paper is not already cut in strips, do that now. The size of the strips is personal choice, but they need to be at least as long as the egg ooutline so as not to have any white gaps. My strips were about one inch wide.
  4. Let your child begin laying down the strips on the full piece of white paper. Have them glue them down to the paper after they are happy with their pattern.
  5. Once all the strip are glued down, put glue on the egg outline cutout paper. We put glue on the side with the black outline, that way no black lines would show on our final piece. Place the paper on the paper with the strips.
  6. Your child can write a Happy Easter message on the final art piece if they like.

Share the Love

Once your child has made their own Paper Strip Easter Egg Craft to hang on the fridge, they can make more for family! We also made a smaller version we can fit in envelopes to send as Easter cards to grandparents. What else would you do with this fun craft?

If your child completed this craft activity, we would love to see their masterpiece! Feel free to share a picture on our Facebook page. Don’t forget to follow us on Facebook and Instagram for more craft fun!

Paper Strip Easter Egg Craft Silly Girl
My silly girl <3

Happy Crafting!

Posted on

Safety Vehicles Paint Kit – A Fun Addition For Safety Themed Lessons

Safety Vehicle Paint Kit - Blog

We have been homeschooling our daughter and this month’s theme is all about safety and emergencies. Our daughter loves art and we love to mix fun activities into our lessons, so we decided to make this Safety Vehicles Paint Kit. It is the perfect addition to spark creativity while creating engagement in your lesson.

Benefits of Hands On Learning

Solely reading books and doing worksheets for class can be quite boring and under-stimulating. Hands on learning is necessary to provide well rounded education and keep your learners engaged and focused. When a child is engaged in their learning, it leads to better retention and a desire to learn.

When a child engages in a learning activity that involves multi-tasking, for example talking and painting, it increases the opportunities for both sides of the brain to be stimulated and develop. This is critical as the right side of the brain, which is known as the creative side, develops first, when children are around four years old. The left side of the brain, known as the logical side, does not develop until years later, between seven and ten years old. Providing activities which cause them to use their right side of the brain while keeping them engaged through creative exercises will lead to better experiences with learning and therefore an interest in learning. You will be able to grow their analytical and language skills while expanding their personal creativity.

How to Incorporate the Safety Vehicles Paint Kit into Your Lessons

One of our most loved ways to incorporate hands on activities with out lessons is with books. Each day we read a book related to our theme of the day. Most of the books we read are either from the library or Usborne Books & More, since I am a representative. Our daughter absolutely loves the flap books, so I knew “Peek Inside How a Fire Truck Works” was going to the perfect book for our fire safety day. The lift-the-flap books keep her engaged since she has to listen to the content, then lift the flap to keep the story progressing.

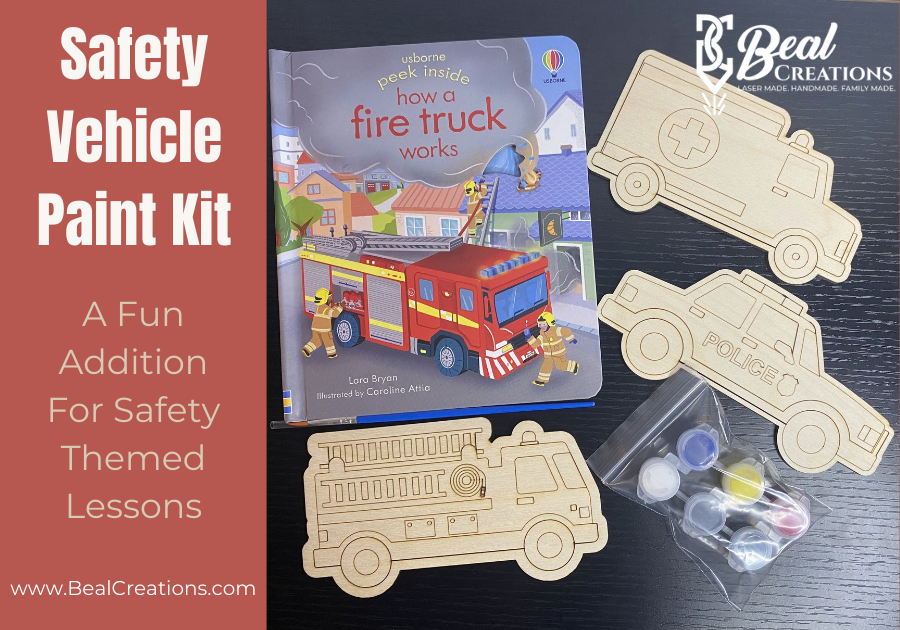
As our daughter paints the fire truck, I leaf through the book again and we talk about things we read. This both helps test her knowledge and better retain information she may have missed the first time. Depending on the book, I may read the whole story to her while she is painting. The simple act of doing something with her hands (sparking the right side of her brain) and listening to the story (sparking the left side of her brain) helps provide that well-rounded lesson that develops her brain more efficiently. You can get your safety vehicles paint kit here. It comes with a wooden ambulance, police car, and fire truck to paint, as well as six paints and one paintbrush.

Safety Vehicles Paint Set

Additional Safety Lesson Resources

Some other books you may like to include in your Safety Unit are “Dial 911”, “Be Careful and Stay Safe”, “How Do Dinosaurs Stay Safe?”, “I Won’t Go With Strangers”, and “Once Upon a Dragon: Stranger Safety for Kids.” I was able to find all of these books at my local library.

I also made a couple worksheets that we worked on together. One was a visual worksheet pictures to circle which were an emergency. The second was to discuss important information to know in case of an emergency. Since our daughter is also practicing her writing skills, she wrote some of the information herself, but I wrote the longer answers. There is also a shape matching game I made where you look at each safety sign and match which shape it is. You can cut these out on cardstock and laminate them to give them a more sturdy and long-lasting effect.

All of these worksheets I created are available to you for free for download below.

Importance of Safety Units

It is critical that even young children know the safety basics, so make sure you are giving them small tidbits of information when you can. It can be as simple as acknowledging stop signs when you are on walks or even acknowledging your street sign and reciting your address. It is easy to fit in this vital information throughout the day without formal, sit at a desk lessons. Be sure they know what qualifies as an emergency and what they should do as an emergency. They need to know who they can turn to for help should you not be there and be able to provide information which identifies who they are and who you are should they be lost.

Safety Vehicles Paint Kit Fire Truck

Happy Learning!